Why Candy Making Can Be Tricky
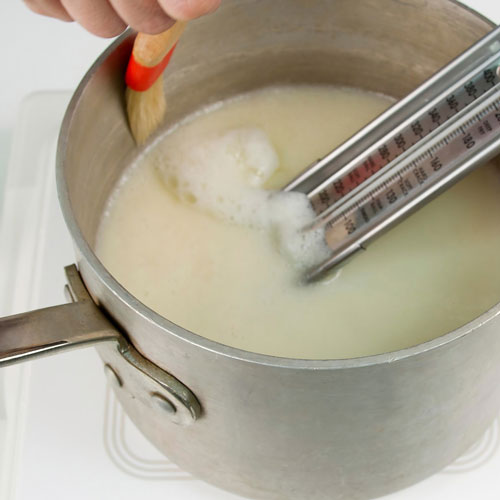 With simple tips, like using a candy thermometer, you can make great candy.
Candy making depends heavily on accurate temperatures, controlled moisture, and proper sugar crystallization. A few degrees too low can leave candy soft. Stirring at the wrong time can make fudge grainy. A tiny drop of water can cause chocolate to seize.
Before troubleshooting candy recipes, check these basics:
- Use an accurate professional candy thermometer.
- Know your ingredients - for instance real chocolate must be properly tempered before using it for molding and enrobing, while candy melts (also known as candy coating, Merckens, almond bark) can simply be melted.
- Measure ingredients carefully.
- Cook candy to the temperature listed in the recipe.
- Avoid making candy on very humid days when possible.
- Use clean, dry candy making tools, pans, bowls, chocolate molds, and silicone candy molds.
- Store finished candy in airtight containers and place in a cool, dry place away from direct light.
Now let's get started on troubleshooting.
Why Does My Chocolate Have White Streaks?
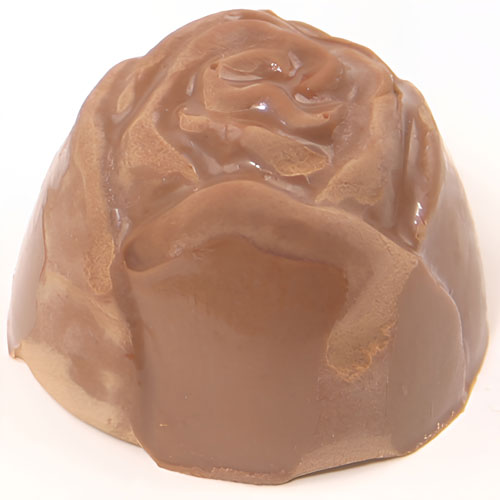 White streaks created from a damp chocolate mold.
White streaks, cloudy lines, or pale patches on chocolate are common and usually affect appearance more than taste.
Common Causes of White Streaks on Chocolate
- The chocolate was not tempered properly (real chocolate with cocoa butter needs to be tempered before using for molding and enrobing unlike user-friendly candy melts).
- The chocolate cooled too slowly.
- Water or steam touched the chocolate.
- The mold was dirty, oily, or damp.
- The chocolate was exposed to moisture during storage.
How to Fix White Streaks on Chocolate
Solid chocolate pieces with white streaks can usually be remelted, properly tempered, and molded again. Make sure all bowls, utensils, and molds are completely dry before working with chocolate.
To help prevent streaks, work in a cool, dry room and avoid sudden temperature changes.
Condensation and Sugar Bloom on Chocolate
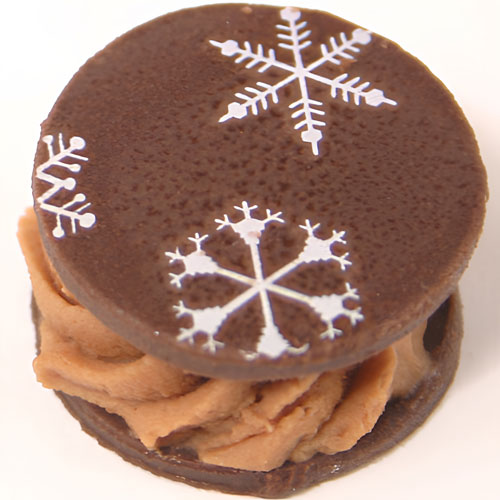 Sugar bloom can ruin the look of your homemade chocolates.
Sugar bloom appears as white streaks, cloudy patches, or a powdery surface on chocolate. It happens when moisture collects on the chocolate, dissolves surface sugar, and then dries. As the sugar recrystallizes, it leaves behind pale marks.
Common Causes of Sugar Bloom
- Chocolate was left in the freezer too long.
- Finished candy was stored in the refrigerator or freezer.
- Cold chocolate was exposed to warm air too quickly.
- Condensation formed on the surface of the chocolate.
How to Prevent Sugar Bloom
- Avoid rapid temperature changes.
- Store chocolate in a cool, dry place.
- Use airtight containers or wrapped boxes for storage.
- Let cold chocolate come to room temperature before unwrapping or opening the container.
Sugar bloom does not usually affect taste, but it does affect appearance and sometimes texture. Affected solid chocolate can be repurposed for ganache, cookies, or brownies.
Why Did My Finished Chocolate Crack?
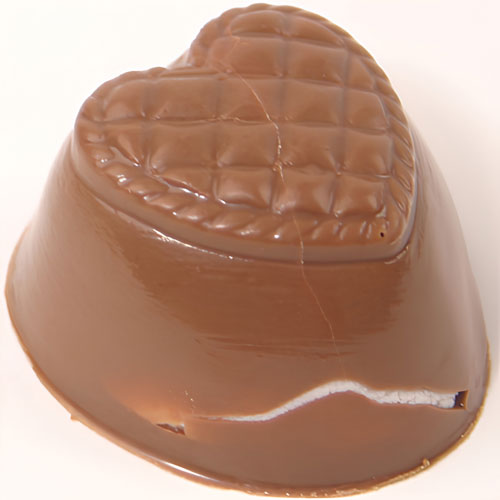 A molded and filled chocolate piece that has cracked.
Cracks in molded chocolates usually happen when the chocolate shell and center expand, contract, or set at different rates.
Common Causes of Cracked Chocolate
- The filling was too cold when added to the mold.
- The chocolate shell was too thin.
- The center expanded after setting.
- The candy was left in the freezer too long.
How to Prevent Cracks in Chocolate
Use a sturdy chocolate shell, especially for filled candies. Avoid adding very cold fillings to freshly molded chocolate shells. The temperature of your set chocolate and filling should be as close in degrees as possible. If using soft or airy fillings, such as marshmallow, leave enough room for the center and avoid overfilling.
Freezing chocolate for too long can also cause cracking. If using the freezer to help release molded chocolates, chill only briefly and remove once the chocolate has contracted from the mold.
What to Do With Cracked Chocolates
Unfortunately, cracked chocolates cannot be fixed. The cracks are usually only cosmetic and can still be used. We carry many colors and sizes of candy cups and foil chocolate wrappers that can hide or make minor imperfections less noticeable.
How to Prevent Air Bubbles in Molded Chocolate
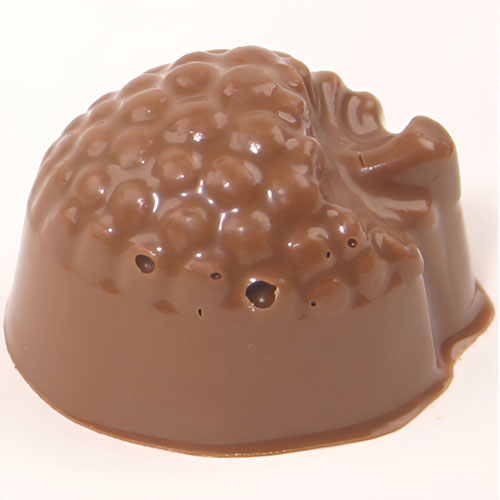 A common issue for molded chocolate - air bubbles!
Air bubbles are harmless, but they can leave molded chocolates looking rough or unfinished. They are especially common in molds with fine details, lettering, sharp edges, or deep cavities.
Common Causes of Air Bubbles
- The filled mold was not tapped firmly enough.
- The chocolate was too thick or too cool.
- The mold had detailed areas that trapped air.
How to Remove Air Bubbles
After filling the mold, tap it firmly and repeatedly on the countertop to release trapped air. For detailed molds, use a small food-safe brush or toothpick to push chocolate into corners, grooves, and fine details before tapping.
Chocolate that flows smoothly will also release bubbles more easily, so make sure it is properly melted and at the right working temperature.
Pro tip: Serious candy makers use vibrating tables to remove air bubbles. In a pinch, you can use a small hand-held massager to vibrate the air out of the chocolate.
Why Does My Chocolate Look Dull?
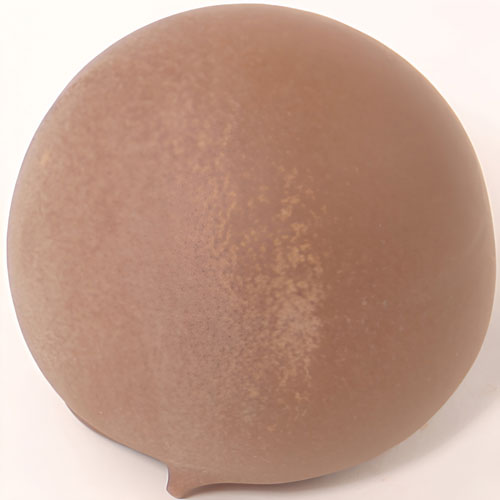 Don't let mishandling of chocolate ruin your shiny, professional finish.
Dull or cloudy patches are usually a sign that chocolate did not set under ideal conditions. The candy may still taste good, but the finished appearance may not be as shiny or professional.
Common Causes of Dull Chocolate
- The chocolate was removed from the mold too soon.
- Real chocolate was not properly tempered.
- The mold was too cold when filled.
- The mold was not clean or completely dry.
- The chocolate cooled too slowly.
- The surface was touched with warm fingers.
How to Get Shiny Chocolate Pieces
- Temper real chocolate properly.
- Use clean, dry molds.
- Allow chocolate to fully set before unmolding.
- Avoid handling finished pieces with bare hands.
- Store chocolate away from heat, humidity, and direct sunlight.
Solid chocolate pieces with dull patches can usually be remelted, retempered, and reused.
What Is Seized Chocolate?
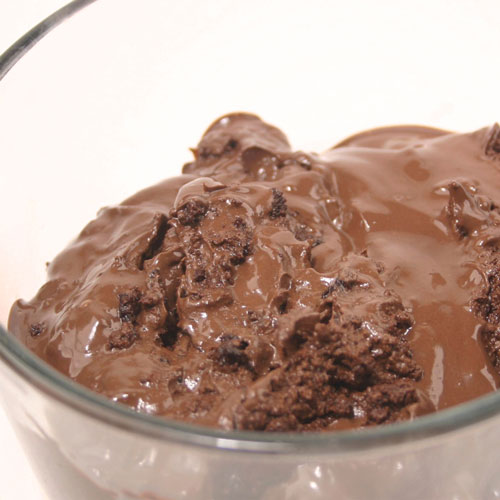 Can seized chocolate be saved?
Seized chocolate turns from smooth and fluid to thick, clumpy, grainy, or paste-like. This usually happens when chocolate comes into contact with moisture or is overheated.
Common Causes of Seized Chocolate
- Water or steam touched the chocolate.
- A wet spoon, bowl, or mold was used.
- The chocolate was overheated.
- The chocolate scorched during melting.
Can Seized Chocolate Be Fixed?
Once chocolate seizes, it usually cannot be restored for dipping or molded candy pieces. If it is not burned, you may be able to loosen it by stirring in a small amount of paramount crystals (if using candy melts) or cocoa butter (if using real chocolate), but the texture may not be ideal for detailed candy work.
How to Use Seized Chocolate
Instead of throwing it away, repurpose seized chocolate into rustic treats. Stir in nuts, pretzels, crushed cookies, cereal, or dried fruit. Spoon the mixture onto parchment paper and let it set into clusters.
Fat Bloom vs. Sugar Bloom in Chocolate
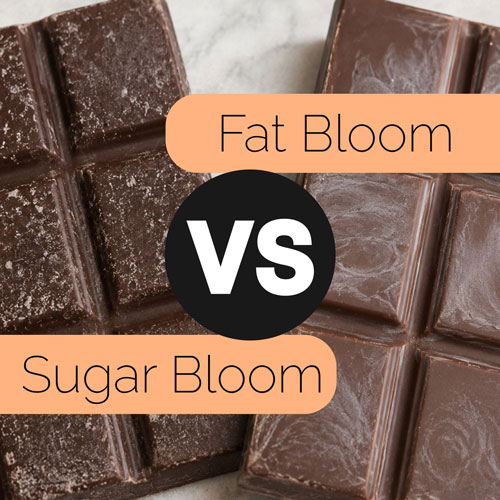 But, is it fat bloom or sugar bloom?
| Issue | Cause | Appearance | Can It Be Fixed? |
|---|
| Fat bloom | Fat separates because of poor tempering, overheating, or temperature changes. | Smooth gray-white streaks, swirls, or slightly greasy patches. | Solid chocolate can usually be remelted, properly tempered, and reused. |
| Sugar bloom | Moisture dissolves surface sugar, which recrystallizes as the chocolate dries. | Dry, rough, or powdery white patches. | It cannot be polished away, but the chocolate can often be repurposed. |
Why Is My Candy Sticky or Soft?
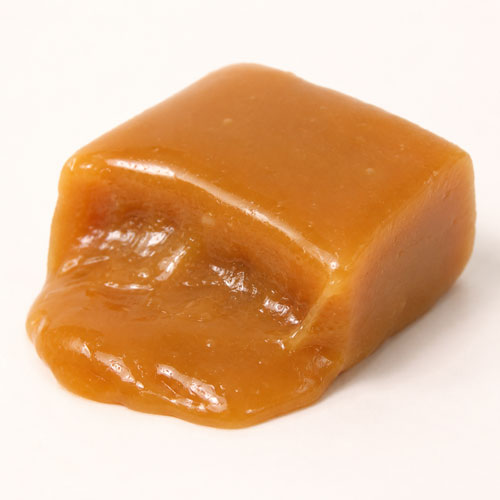 Caramel will be sticky and soft if not cooked to the correct temperature.
If candy feels sticky, soft, or difficult to handle after cooling, it most likely did not reach the proper cooking temperature or absorbed moisture from the air.
Common Causes of Sticky Candy
- The candy was undercooked.
- The candy thermometer was inaccurate.
- The weather or kitchen was too humid.
- The candy was not stored in an airtight container.
How to Fix Sticky or Soft Candy
First, test your candy thermometer. Temperature is one of the most important parts of candy making, and even a small error can affect the final texture.
If the candy is not burned and the recipe allows it, return the candy to a heavy-bottom saucepan and continue cooking until it reaches the correct temperature stage.
Humidity can also cause candy to soften after it has already been made. On humid days, use air conditioning or a dehumidifier if possible, and keep finished candy covered or sealed.
What to Do With Soft Fondant
If fondant is too soft, mix in dry fondant mix or melted chocolate to help absorb excess moisture and firm the texture. Soft fondant can also be used as a center for molded chocolates. Simply line a chocolate mold with tempered real chocolate or melted candy melts, add the fondant filling, and seal with more chocolate.
Why Is My Candy Grainy?
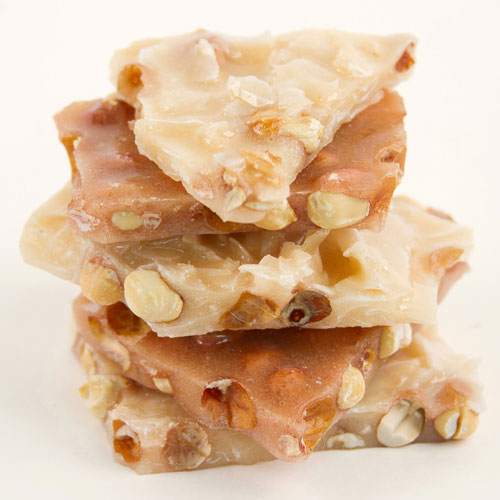 Using these tips will help you create perfectly cooked hard candies.
Grainy candy usually happens when sugar crystals form too early or grow too large. This is especially common with cooked fudge, fondant, brittles, and hard candies.
Common Causes of Grainy Candy
- Fudge was stirred while it was too hot.
- Sugar crystals formed on the side of the pan.
- The pan was scraped while pouring.
- Hard candy absorbed moisture during storage.
How to Prevent Grainy Candy
Stir ingredients thoroughly before cooking so everything is evenly dissolved. Once the candy begins to boil, stop stirring unless the recipe specifically instructs otherwise.
For many cooked candies, placing a lid on the pan briefly once the mixture starts boiling can help. The steam washes down sugar crystals from the sides of the pan before they can fall back into the candy.
When pouring cooked candy, avoid scraping the sides of the pan. Sugar crystals stuck to the pan can seed the entire batch and cause a grainy texture.
Finished candy should be wrapped tightly or stored in airtight containers, especially in humid environments.
How to Save a Grainy Batch of Cooked Fudge
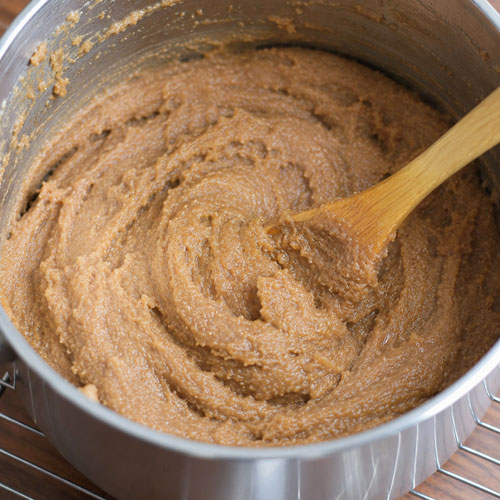 Don't throw away your batch of grainy fudge, save it!
A batch of cooked fudge that turns out grainy does not always need to be thrown away. As long as the candy is not scorched or burned, it can often be reworked.
How to Rework Cooked Fudge
- Place the fudge in a heavy-bottom saucepan.
- Add 1/2 to 1 cup of water.
- Heat gently over low heat, stirring only until the candy softens and dissolves.
- Once smooth, cook again according to the original recipe.
- Use a tested candy thermometer to cook to the correct temperature.
- Add flavoring again if needed, since reheating may weaken the flavor.
Important: Do not add milk or cream when restoring cooked fudge. Dairy can interfere with the texture and may cause scorching or separation.
Tips for Perfect Cooked Fudge
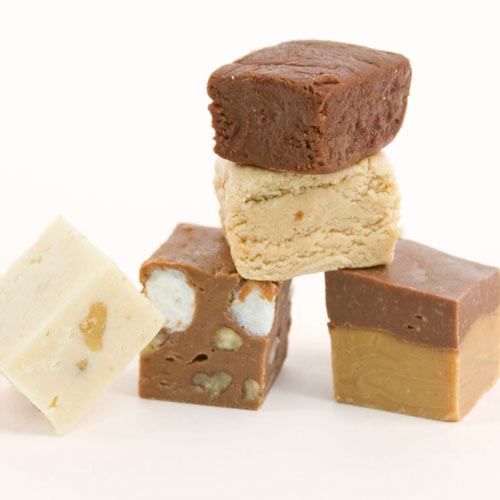 Perfectly cooked fudge makes a great gift!
Cooked fudge is one of the most loved homemade candies, but it is also one of the most sensitive. Temperature, timing, and beating all affect the final texture.
Test Your Thermometer
Always test and calibrate your candy thermometer before making fudge. A few degrees can make the difference between smooth, creamy fudge and dry or grainy fudge.
Do Not Stir Once the Mixture Boils
Once fudge begins to boil, do not stir unless the recipe tells you to. Stirring at this stage can encourage sugar crystals to form too early, which can make the fudge grainy.
Beat Fudge at the Right Time
After cooking, allow fudge to cool undisturbed until it is warm but no longer hot. Then beat until the mixture thickens, loses its glossy shine, and becomes almost firm.
This step creates the fine crystal structure that gives cooked fudge its smooth, creamy texture.
Frequently Asked Questions About Candy Making
Why is my candy sticky after cooling?
Sticky candy usually means the candy did not reach the correct cooking temperature or absorbed moisture from the air after cooling.
Can grainy fudge be fixed?
Often, yes. If the fudge is not burned, it can sometimes be reheated with water, dissolved, and cooked again to the correct temperature.
Are white streaks on chocolate safe to eat?
Yes. White streaks are usually caused by bloom and typically affect appearance, not taste.
Why did my molded chocolate crack?
Cracking can happen when the shell is too thin, the filling is too cold, the center expands, or the chocolate is chilled too long.
Can seized chocolate be used?
Seized chocolate usually will not work well for molding or dipping, but it can often be repurposed into chocolate clusters with nuts, pretzels, cookies, or dried fruit.
More Candy Making Tips, Techniques & Recipes
Whether you're making chocolates, fondant centers, cake pops, or homemade candy, these additional guides, recipes, and resources can help you build your candy-making skills and solve common challenges.
Candy Making Basics
-
Shop Candy Making Supplies
– Browse candy molds, chocolate, flavorings, packaging, tools, and supplies for every candy-making project.
-
How to Calibrate and Test Your Thermometer
– Learn how to test your candy thermometer for accuracy before making fudge, hard candy, caramels, and other cooked candies.
-
Four Easy Ways to Melt Chocolate
– Compare the microwave, double boiler, melting pot, and other popular chocolate melting methods.
-
Flavoring Compatibility Guide for Chocolate and Candy Melts
– Discover which flavorings work with chocolate and candy coatings and which ingredients can cause chocolate to seize.
Chocolate Making Tutorials
Fondant & Candy Center Recipes
Specialty Candy Projects