Achieving Perfect Rolled and Cut-out Cookies
Baking rolled and cut-out cookies is both a joy and an art. These cookies, with their charming shapes and delicious flavors, bring smiles to faces and warmth to gatherings. Yet, crafting them just right demands attention to detail and technique. In this guide, we'll explore the precise steps to create flawless rolled and cut-out cookies, ensuring each batch is a delight. From selecting tools to mastering rolling and cutting, let's embark on this delicious journey together and unlock the secrets to cookie perfection.
This guide simplifies the process of making rolled and cut-out cookies, ensuring success for every baker. With straightforward instructions and practical tips, you'll learn how to choose the right tools, including pastry rulers, to achieve precise thickness in your dough. You'll also discover how to prepare the dough correctly and master the rolling and cutting techniques. By the end, you'll have the confidence to create beautifully shaped and flavorful cookies that everyone will love. Let's get started on this baking journey together!
Ingredients
- silicone mat or parchment paper
- pastry rulers
- rolling pin
- cookie sheet
Instructions
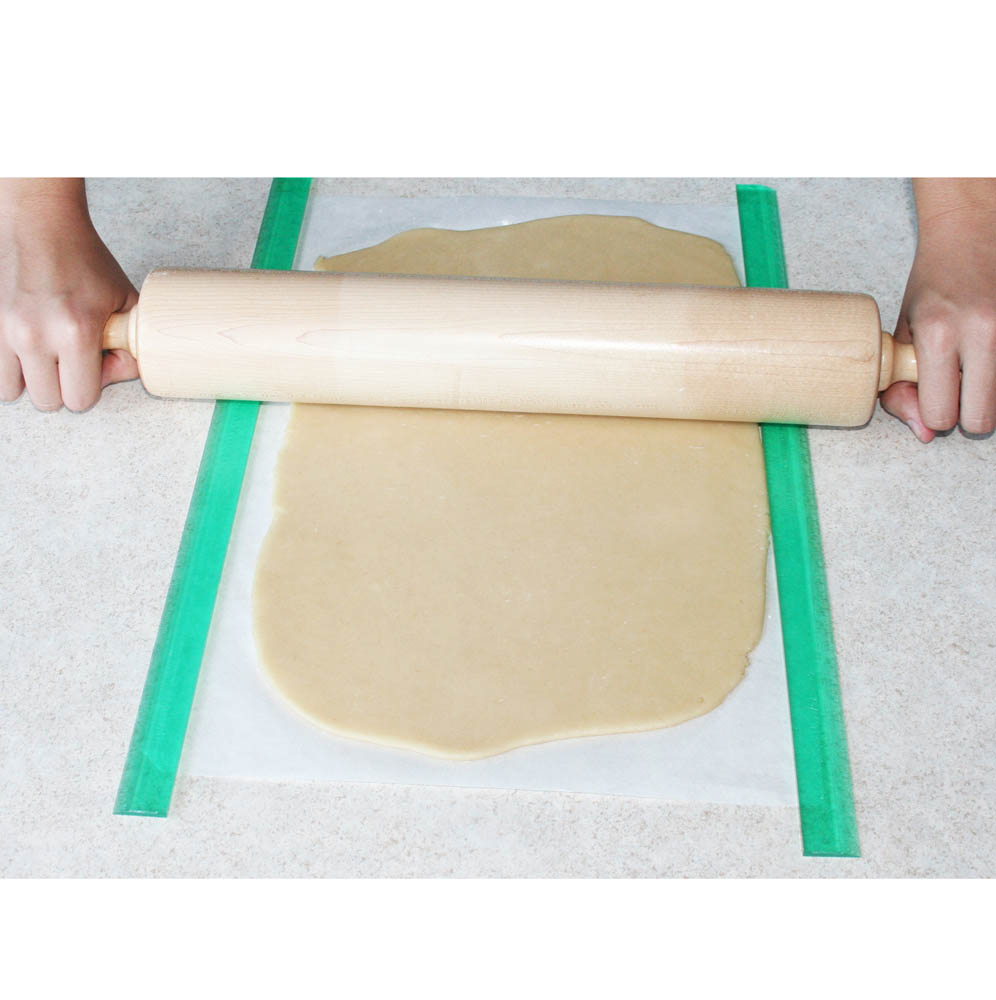
STEP 1: Place chilled dough on silicone baking sheet (shown) or parchment paper. Place pastry rulers on top of silicone or parchment. Roll out dough between two rulers. STEP 2: Cut out shapes, leaving approximately 1/4" of space between each cookie. (Space will vary according to recipe. Roll-out cookies that expand will need more space between each cookie). Remove excess cookie dough from around the cut shapes. Transfer Silicone or parchment to cookie sheet and bake as usual.