Instructions
Start by washing and thoroughly drying 15 strawberries. Ensure that the strawberries are relatively the same size and shape. Once strawberries are completely dry, melt 1 pound of white melting wafers in a deep dish or cup. If chocolate melts thick, use 1-2 tablespoons of paramount crystals to thin the chocolate to a smooth, even consistency.
To create a marbled effect on the strawberries, melt the white chocolate completely and then add drops of oil-based food coloring sporadically on the surface of the chocolate. We used hot pink food coloring in the brand Colour Mill.
Use a toothpick or skewer to swirl the coloring into the white chocolate. Mix the chocolate just enough to create lines in the chocolate. Over mixing will color the chocolate, and will not give the desired marbling effect. Two or more colors can be added to achieve multiple different designs.
Once the food coloring is swirled into the chocolate, dip the strawberry until the chocolate is covering most or all of the berry. Slowly twist the strawberry as you pull it out of the chocolate. This will create a realistic marble pattern on the berry.
Let the excess chocolate drip back into the bowl or cup, then lightly drag the back of the strawberry on the edge of the container to avoid leaving too much extra chocolate on the berry.
Once the excess chocolate is removed the berry can be placed on a sheet of parchment paper to dry. Continue until all strawberries are dipped in the chocolate.
If the marble effect is not as prominent as you would like, more food coloring can be added to the chocolate as you are dipping. Continue until all of the strawberries are dipped. In about 20-30 minutes the chocolate should be completely hardened allowing you to peel off the parchment paper with ease.
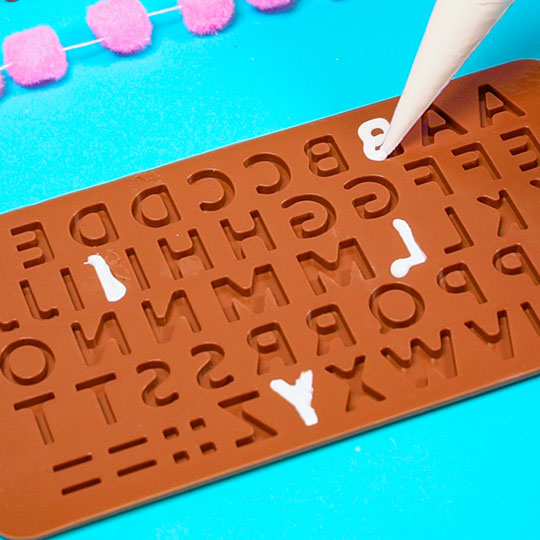
While the berries are drying, prepare the letters for the top of the strawberries. Do this by placing a ½ cup of white melting wafers into a pastry bag and melt in the microwave in 15 second intervals. Make sure to massage the bag in between melting times to ensure all chocolate is thoroughly mixed and no unmelted pieces remain. Cut a small hole in the tip of the pastry bag and slowly squeeze the chocolate into the silicone mold of your choice. Flex & tap the mold on the counter to help remove any air pockets. Additionally, use a spatula to help smooth the backs of the chocolate letters.
Place the mold in the freezer for 5-10 minutes to harden completely. Remove from the freezer and slowly pull the edges of the mold releasing the chocolate letters slowly. As the chocolate will be fragile and break easily, it is always a good idea to make more than needed just in case one breaks. Try not to hold the chocolate for too long as it can begin to melt and change shape, or make imperfections on the chocolate.
Next step is to give the chocolate letters a metallic finish. This can be done in rose gold, silver, or gold. Pour nonpareil sprinkles into a cup with about a teaspoon of luster dust of your choice.
For this recipe we used rose gold luster dust from the brand Rolkem. Mix the luster dust into the sprinkles until the dust is dispersed evenly.
Then, carefully place the chocolate letters and shapes into the sprinkle mixture.
Stir the chocolate pieces into the sprinkles until the letters and shapes are all evenly coated. Use tweezers to remove and handle the chocolate after it has been coated in the luster dust. This prevents scratches or patching on any of the chocolate pieces.
To apply the chocolate pieces to the strawberries reheat the pastry bag used to create the chocolate letters. Squeeze a small amount onto the strawberry and place the letters with tweezers holding for 5-10 seconds while the chocolate hardens. Another method is to apply a small amount of chocolate directly onto the chocolate letters and then press the letters on the strawberry. Continue until all letters and shapes are attached to the strawberries.
Place each strawberry in a small baking cup to showcase it on a table or in a box. Add filler to the box for display and protection during transportation.
Store refrigerated for up to 2-3 days for optimal freshness.